By Gina “Jet” Ortiz
Whether you’re an experienced makeup-wearer or you’re just starting out, you might not know which eyeliner type is best for which specific situation. I’ve put together a guide to help you decide which type is best for which situation. And remember: always apply your eyeliner after your eyeshadow and before your lashes. Like with any eyeliner, you should be seated comfortably with your elbow stabilized on a table. Don’t try to do it while standing or leaning over a sink!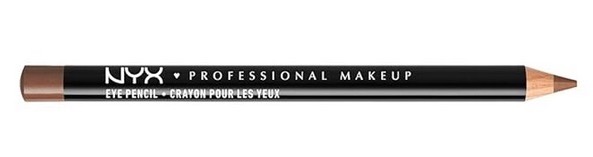
Pencils: Best when you want something quick and easy, best for top lash line, best for a “smudgy” or “smokey” look. Usually not waterproof, removes easily.
Pencils are the most common and convenient of all the liner types, but that doesn’t necessarily mean they’re the best for every look or situation. For instance, using a black, harsh line in your bottom “water/wet” line isn’t a good look unless it accompanies a Smokey Eye and it’s probably not a good idea to wear it at work.
Pros: Readily available, easy to find, come in a zillion colors, and inexpensive. They’re also usually the easiest for beginners to get used to. They come in a range of “creaminess” so they’re easier to apply for some people. They’re good for a “smudgy” line but not so much for a sharp line. I only use pencil liners for the bottom “water/wet” line and only if I’m doing a Smokey Eye. I don’t use them at all for the top lash line.
Cons: They’re not great for doing a really defined “wing” because it’s difficult to achieve a sharp point with a pencil, and they tend to “skip,” leaving a jagged line. They also require a quality sharpener, which means messy shavings to clean up and constant cleaning of the sharpener (with a Q-Tip and alcohol).
TIP: Try to avoid a “hard” line along the bottom lash line or water/wet line. A hard line looks too harsh and unnatural and should be “softened.” For a “smokey” look, smudge it with a Q-Tip after applying. Try it with brown, plum, or grey instead of black!

L’Oreal Liner Pen
Pens: Best when a very dark and sharp line or “wing” is your goal, and best when you need that line to stay put for a long time.
If you haven’t used one of these yet, think of them as a felt-tip marker for eyes. They are made by a zillion different brands and come in various colors and formulas (waterproof or not).
Pros: Readily available and easy to find. I prefer these over pencils for lining the top lash line because they have a very sharp point. They’re much darker and more dramatic than a pencil and are much smoother to apply a bold line with, and they won’t “skip.” I also love the fact that they are waterproof (you have to check the label!) and will not smudge when dry.
Cons: As much as I love these liner pens, I don’t use them much due to their two big drawbacks: they’re expensive and they dry out quickly. Even if you’re very careful about making sure the lid is closed tightly, they still seem to dry out quickly. And for me, $15 is not worth a pen that’s only going to last a few weeks or uses.
TIP: Some of these liner pens must be shaken before use and you won’t know if yours does until you shake it and hear a bee-bee moving around (like nail polish).

Liquid liner
Liquids: Best when a very dark and sharp line or “wing” is your goal, and best when you need that line to stay put for a long time. The line is similar to that of the pens but are easier to use for some people.
Unless you live on Mars, you’ve probably used (or tried to use) a liquid liner. If you struggle with liquid liner, you are not alone. I can guarantee the reason why so many people struggle with these liners is because of the brush size. The teeny-weeny brushes that come in these small bottles are a pain because the handle is too short. The bristles are also very fine and are designed to give you a nice, thin and sharp line. But this, in my opinion, is what makes them such a challenge. If you’re trying to get a bold line, then you must make several “passes” across the eyelid and that can only mean one thing: more passes means more chances of making a mistake! You can remedy this situation by simply using another brush (if you can fit it into the tiny container) and the wider bristles will help tremendously.
Pros: The best part of these liquid liners is their pigmentation. They are black as night and smooooth to apply. They come in waterproof (or not) and can do a razor-sharp wing with the greatest of ease once you’ve mastered it. They’re easy to find and very affordable.
Cons: The tiny containers and tiny brushes are a nightmare for a beginner. The hairline bristles require multiple passes in order to get a thicker line, and this increases the chances of ruining it. They’re also much tougher to remove than pencils or pens, so you need to use some kind of oil to remove them (I use coconut).
TIP: Try using a long-handled artist’s brush. If you can’t fit the brush into the opening of the container, you can try to widen the opening, or find a narrow brush that will fit. Walmart sells very inexpensive artist’s brushes that are perfect for this. It’ll make a world of difference.
Gels: These are an alternative to pencils, pens, and liquids. They come in a pot and are much thicker, which makes them easier to use for some people.

You’ve probably seen these at some point since they are very common now and made by a million different brands. Gel liners come in a tiny glass pot and usually come with their own little angled brush. You don’t have to use their tiny little brush if you don’t want to. You can use your own angled or pointed brush with these, but make sure it’s a synthetic bristle brush and not a natural-hair bristle. The gel liner formulas will destroy your natural brushes!
Pros: These formulas are very densely pigmented and most are waterproof and smudge-proof (check the label!). Once you’ve “warmed it up,” it will apply very smoothly. You can use them with any synthetic bristle brush and they will stay put until you remove them with oil or strong makeup remover. Gel liner is great once you’ve mastered it.
Cons: These require a learning-curve. This is a very thick substance that you’re trying to paint a fine line with. You must “warm up” this material in order to make it fluid enough for application. Simply sticking your brush into the pot while it’s cold and then trying to put it on your eyelid is not the best approach. Another drawback is that you have to clean the brush immediately after applying or else it will harden in the bristles and be very difficult to remove later.
TIP: Remove a small bit of the material with a little scraper or spatula (or tip of a butterknife) and place the tiny bead onto the back of your opposing hand. Hurry up, it dries quickly! Work your brush bristles into the material to saturate the bristles and quickly apply it to the upper lash line. Let it dry before you start on your lashes or mascara, and don’t forget to clean the black dot off your hand! Clean the brush immediately after use.

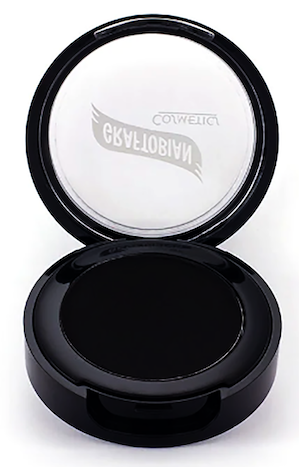
Cream Liner-Shadow
Cream/crème: These are like gels but they are not as thick and can be much easier to use for some people. They come in more colors and they smudge better than the gels.
You might not know about the cream eyeliners on the market because they’re not everywhere like the other types are. You have to seek them out. They are a lot like the gel liners in that they come in a little pot, they are highly pigmented, and they come with their own (tiny) brush, but they are much creamier and easier to work with than the gels. If you want a waterproof formula, you must check the label. Note: cream/crème eyeshadows and eyeliners are more or less interchangeable. You can use the shadows as an eyeliner, and you can use the eyeliners as a shadow.
Pros: They’re creamier, smoother to apply, don’t require “warming,” and they come in a lot more colors. They can also be used as a base underneath your powder eyeshadow to intensify it and they allow for much more room for experimentation because they can be used with any size brush and are not limited to the tiny brushes that come with them.
Cons: Like the gel formulas, they require a bit of a learning curve because they dry quickly. They must be applied and blended quickly. They’re a bit harder to find and are not going to be found at every drugstore or makeup retailer. You have to hunt them down, but they’re worth it.
TIP: Scrape a small bit of the material out of the container and place it on the back of your opposing hand. Close the cap tightly! Work the material into the bristles of your brush and apply. If you’re going to do any blending or smudging, do it quickly. Allow to dry before continuing with lashes or mascara. Remember that these types of liners come in many colors so you’re not just limited to black. Experiment and have fun with it! Visit Maybelline’s eye makeup page.
Cake liner
Cakes: This type is a little more work but very versatile. One container will outlast ten of the other types and can do everything they do, and then some.
Many makeup wearers aren’t even aware that this type exists, and that’s because it’s hard to find. Very few manufacturers make it and therefore, it isn’t popular. So then why am I even mentioning it? Because it’s wonderful! I use it on nearly all of my clients because of its versatility. It comes in a little pot (or palette) and it’s dry as a bone. It must be activated with water (or “mixing liquid” if you want it to be waterproof). I love it because it lets me control how dark or lightly I apply it, how wide or thin I want the line (I can use a thick or thin brush), and whether or not I want it to be waterproof. If a client is just going to be at the studio for a photo shoot, then I don’t need it to be waterproof. It’ll be much easier to remove. If they are going out for an event, then I will simply replace the water with mixing liquid and voila! Now it’s waterproof! Check out Kryolan’s cake liners.
Pros: Highly versatile and allows for much more control. Lasts 10x longer than the other types.
Cons: Hard to find and requires a separate component to use it (water or mixing liquid, which must also be hunted down), and has a big learning curve. It’s worth the trouble though, and you won’t want to use anything else once you’ve mastered it.
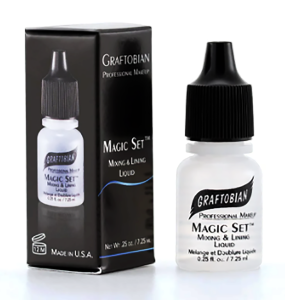
Mixing Liquid
TIP: If it doesn’t need to be waterproof, then you can activate it with water. Simply wet your brush and place it into the cake. You must work it up into a creamy texture and this will require adding more water to the brush several times until you get the consistency you like. If it does need to be waterproof, then you simply skip the water and instead use a “mixing liquid.” You can adjust the intensity of the color by how much liquid you use; a lot of liquid will make a thin, transparent line (careful not to use too much liquid or else it will drip into the eye), and less liquid will make a darker, more opaque line. You can use a very thin brush or a very thick brush to control the width of your line. Wash your brush immediately after use and leave the lid off the container until the cake dries back out. I leave it out overnight just to be safe. Remember to experiment and have fun!
Related
Category: Makeup, Transgender How To
