Transform Day Makeup to Night Makeup
From Day to Night: How to Upgrade Your Makeup in a Few Easy Steps.
By Gina Jet

Day makeup to night makeup.
Going from “work makeup” to “nightlife makeup” can be challenging if you don’t have an opportunity to go home to fix your makeup. Nobody wants to put in an appearance at an unexpected or spontaneous gathering wearing the makeup they’ve had on since morning. Not only does that tired old makeup want to be refreshed after a long day, but it also wants to be “jazzed up” too!
It doesn’t have to be simple “work makeup” that you want to fix. It could be that you’ve been at an outdoor music festival all day and now want to move the party to a bar. Maybe you’ve been lunching with the girls and you’ve all decided to go out dancing when the sun sets. There are many occasions when we carry our daytime activities well into the evening, especially in the summertime, and especially with a date that’s going well!
It’s happened to me many times; I’m at a daytime function that continues into a nighttime function and I’m stuck in my plain, wearing-thin morning makeup when all the other ladies look fabulously fresh. I learned early on that I could carry just a few items in my purse that will let me “upgrade” my look quickly and easily.
If you’re new to makeup, the first thing you must learn, besides basic application, is the “when and where” part of it. Not all makeup is appropriate everywhere and learning what should and should not be done is an essential part of gaining makeup experience. Although we’ve all heard a million times the old cliché “there are no rules,” I’ll be the first one to challenge that point. For instance, heavy makeup is a no-no in bright daylight because even the most masterful artists will agree that it just does not look good. Conversely, makeup that is too subtle in a nightlife environment is perfectly acceptable but can appear “plain” or “cautious.” That’s not to say that there’s anything wrong with an understated makeup look, but I’m of the opinion that makeup enthusiasts will enjoy the process of experimentation and just plain having fun with their makeup.
So then what exactly is daytime makeup? In the mind of a professional makeup artist, it’s a makeup “style” that would be appropriate in any daytime environment, including work and play. I want my daytime makeup to look good at the office, store, or restaurant I work in, and I want it to look good at the little outdoor bistro I’m dining at with my lunch date. It’s makeup that I would wear to the dentist or to get my nails done, and yes, to an outdoor music or art festival where every little flaw would be glaringly obvious.
Now that I’ve covered the “when and where” part of daytime makeup, I must discuss the “how.” A general rule of thumb for daytime makeup is the actual colors and shades you use. A natural or “neutral” color palette is a given, yes, but the dark or light “values” are more important. In other words, you could use colors that are outside of the neutral spectrum, as long as they are “light.” For example, you can use grays and pinks and plums as long as they are not dark. A safe approach to daytime makeup is to stay away from anything dark, such as black eyeliner, red lipstick, and even too-dark browns. The point is, you’ll still do your foundation as usual, but the eyeshadow and lip colors you choose will determine the difference between a daytime and nighttime makeup look.
Assuming that you’ve done a nice daytime makeup look for your daytime activities, you might not be confident in switching it up to a nighttime look without starting all over again. You can “intensify” the makeup you’re already wearing in just a few easy steps without ruining it. You just need to know which items to keep in your little makeup pouch inside your purse!
Let’s assume that you can’t go home to adjust your makeup and you’re trying to do it in a public restroom (it happens!). The first thing you’ll need to do is grab a wadded-up Kleenex or napkin and gently wipe off the “old” eyeshadow and lipstick. Do NOT try to remove the foundation. Once you’ve removed, or at least significantly “softened” the old stuff, you should go over all areas of the face with pressed powder to “freshen” the base. The next step is to assess your brows to determine if they need to be reshaped or, in my case, reapplied altogether. Then you can apply some eyeshadow in a darker or more intense color or shade and apply some dark or black eyeliner (if you wear it). If you need a quick sweep of fresh mascara, this is the time to do that. Lastly, go ahead and apply a richer lip color in any shade you like, and give it all a quick mist of setting or moisturizing spray if you have it. That’s it! Done!
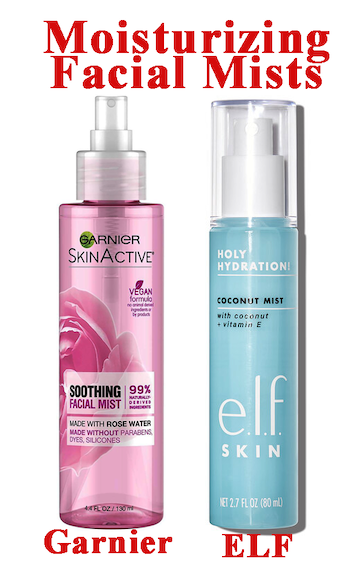 The takeaway here is not just that this should be done, but what exact products should be carried in your “emergency kit.” Of course you don’t need to carry an entirely separate makeup pouch in your purse at all times just in case you “might” want to have drinks after work. No, but it wouldn’t hurt to have a small pouch of nighttime makeup in the glovebox of your car. You should always carry a powder compact, a couple of Q-Tips, some lash glue if you wear falsies, a dark or black liner pen/pencil, a darkish lip color, and a darkish eyeshadow palette (even just a trio or quad will do) would also be helpful. Don’t forget to include one or two sponge wand applicators and/or eyeshadow brushes. Last but not least, invest in a moisturizing facial mist and put some into a small, travel-size spray bottle. You would not believe what a difference that little spray bottle can make for freshening up your skin and hair! Give your finished nighttime makeup and hair a quick misting of the moisture spray and you’ll feel as good as new! Voila! Day to night in under five minutes!
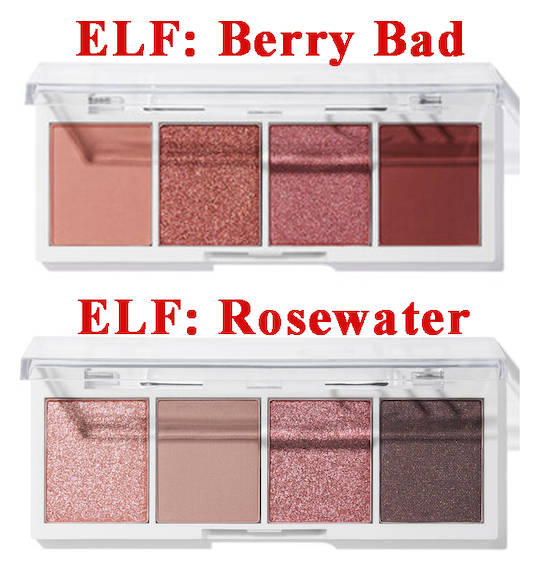
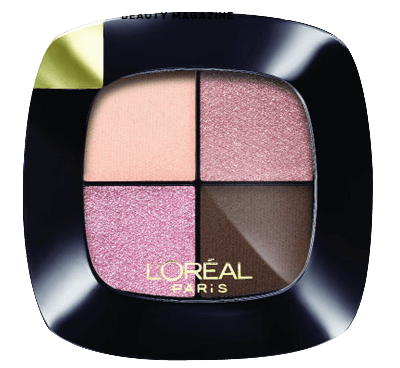 Although just about every company makes these mini eyeshadow palettes, they vary widely in price and availability. I’ve included a few choices below, ranging from under $5 for the ELF and the Wet n’ Wild, up to $55 for the Charlotte Tilbury in case you prefer the luxury brands. I chose them for their size and color range. Most companies now make these moisturizing facial mists but these two (ELF and Garnier) are my favorites for their price and availability. All of these products are available at all drug stores except the Charlotte Tilbury, which can be found at Sephora, Ulta, and the like.


Related
Category: Makeup

